Build Your First Game In Core
Overview
Jump in and build a game using Core's Deathmatch framework. Customize as much or as little as you want to build this multiplayer arena shooter.
- Completion Time: 10 minutes.
- Previous Knowledge: Installing Core.
- Skills you will learn:
- Core Frameworks
- Core Content
- Manipulating Objects
- Applying Materials
- Collision
- Player Settings
- Game Settings
- Spawn Points
Start a New Project
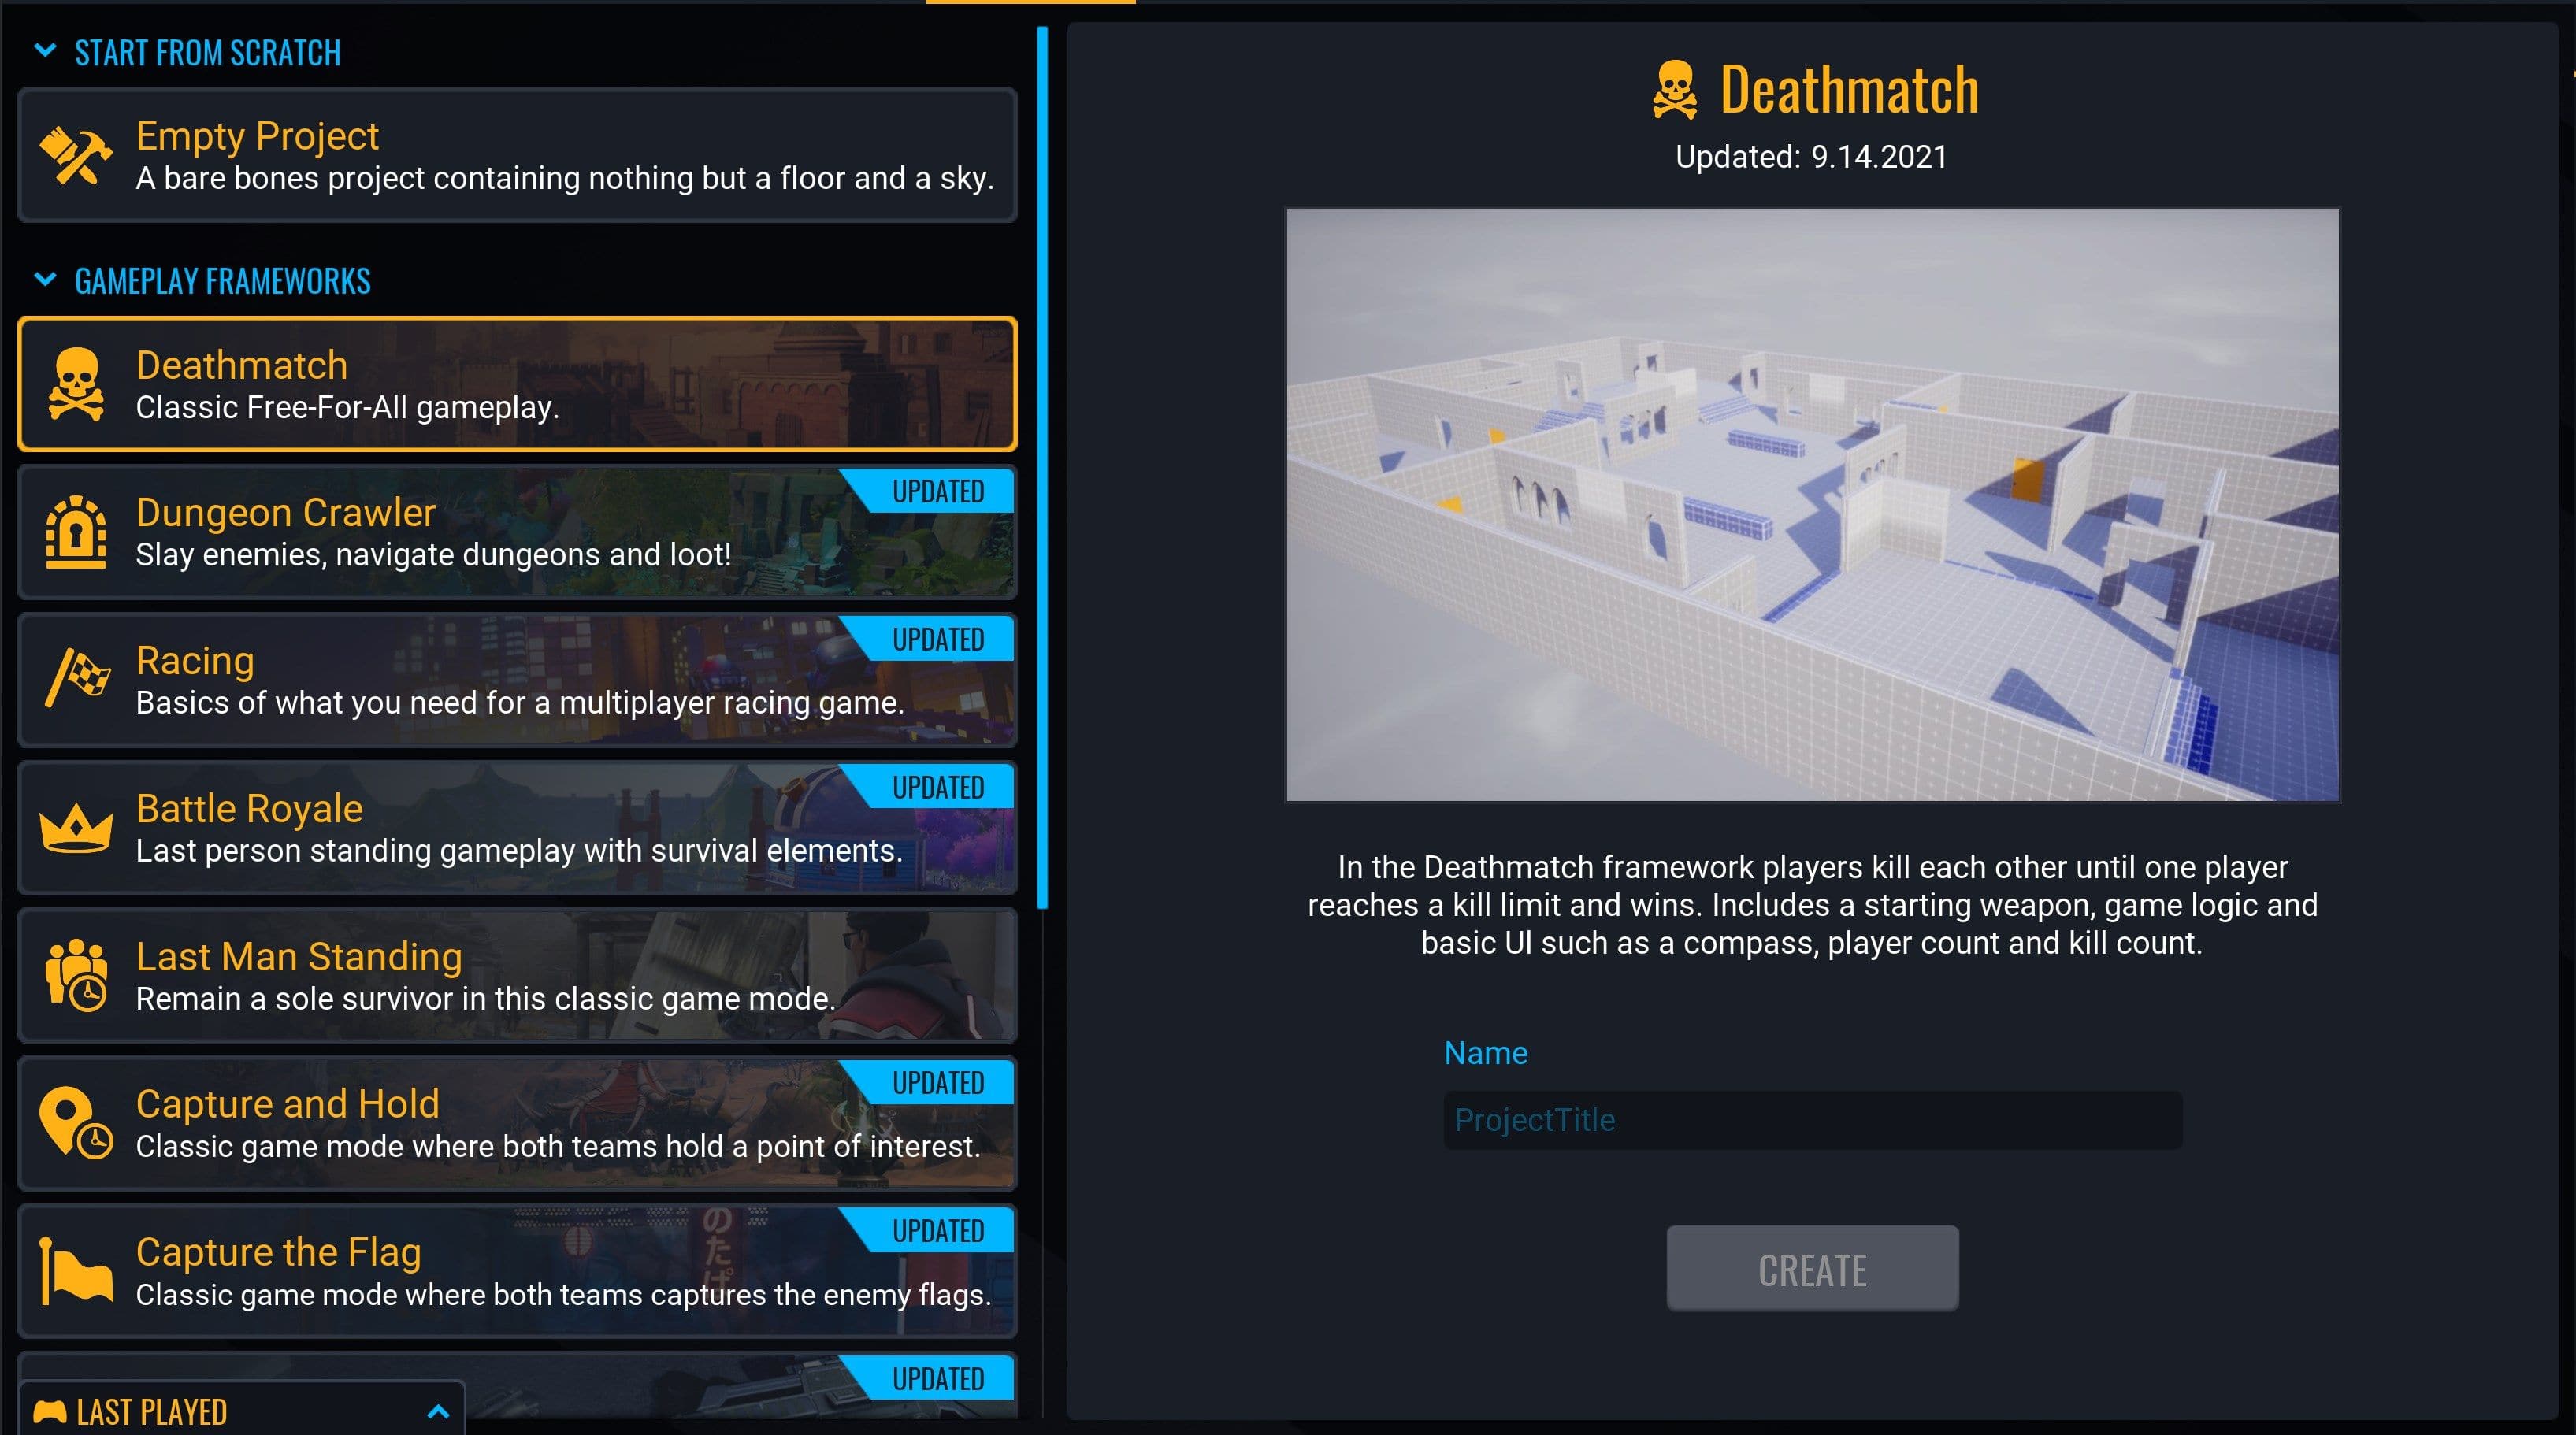
To get started, use the Create menu to make a new project
Open the NEW PROJECT Menu
- With Core open, click the CREATE tab in the top menu bar.
- Click the NEW PROJECT tab at the top of the CREATE menu.
Select the Deathmatch Framework
- In the GAMEPLAY FRAMEWORKS section, select Deathmatch.
- In the right side panel, name your project.
MyFirstGameworks well, but choose any name. - Click CREATE.
Note
The name you chose for the project at this stage does not have to match the final name of the published game.
Explore the Project
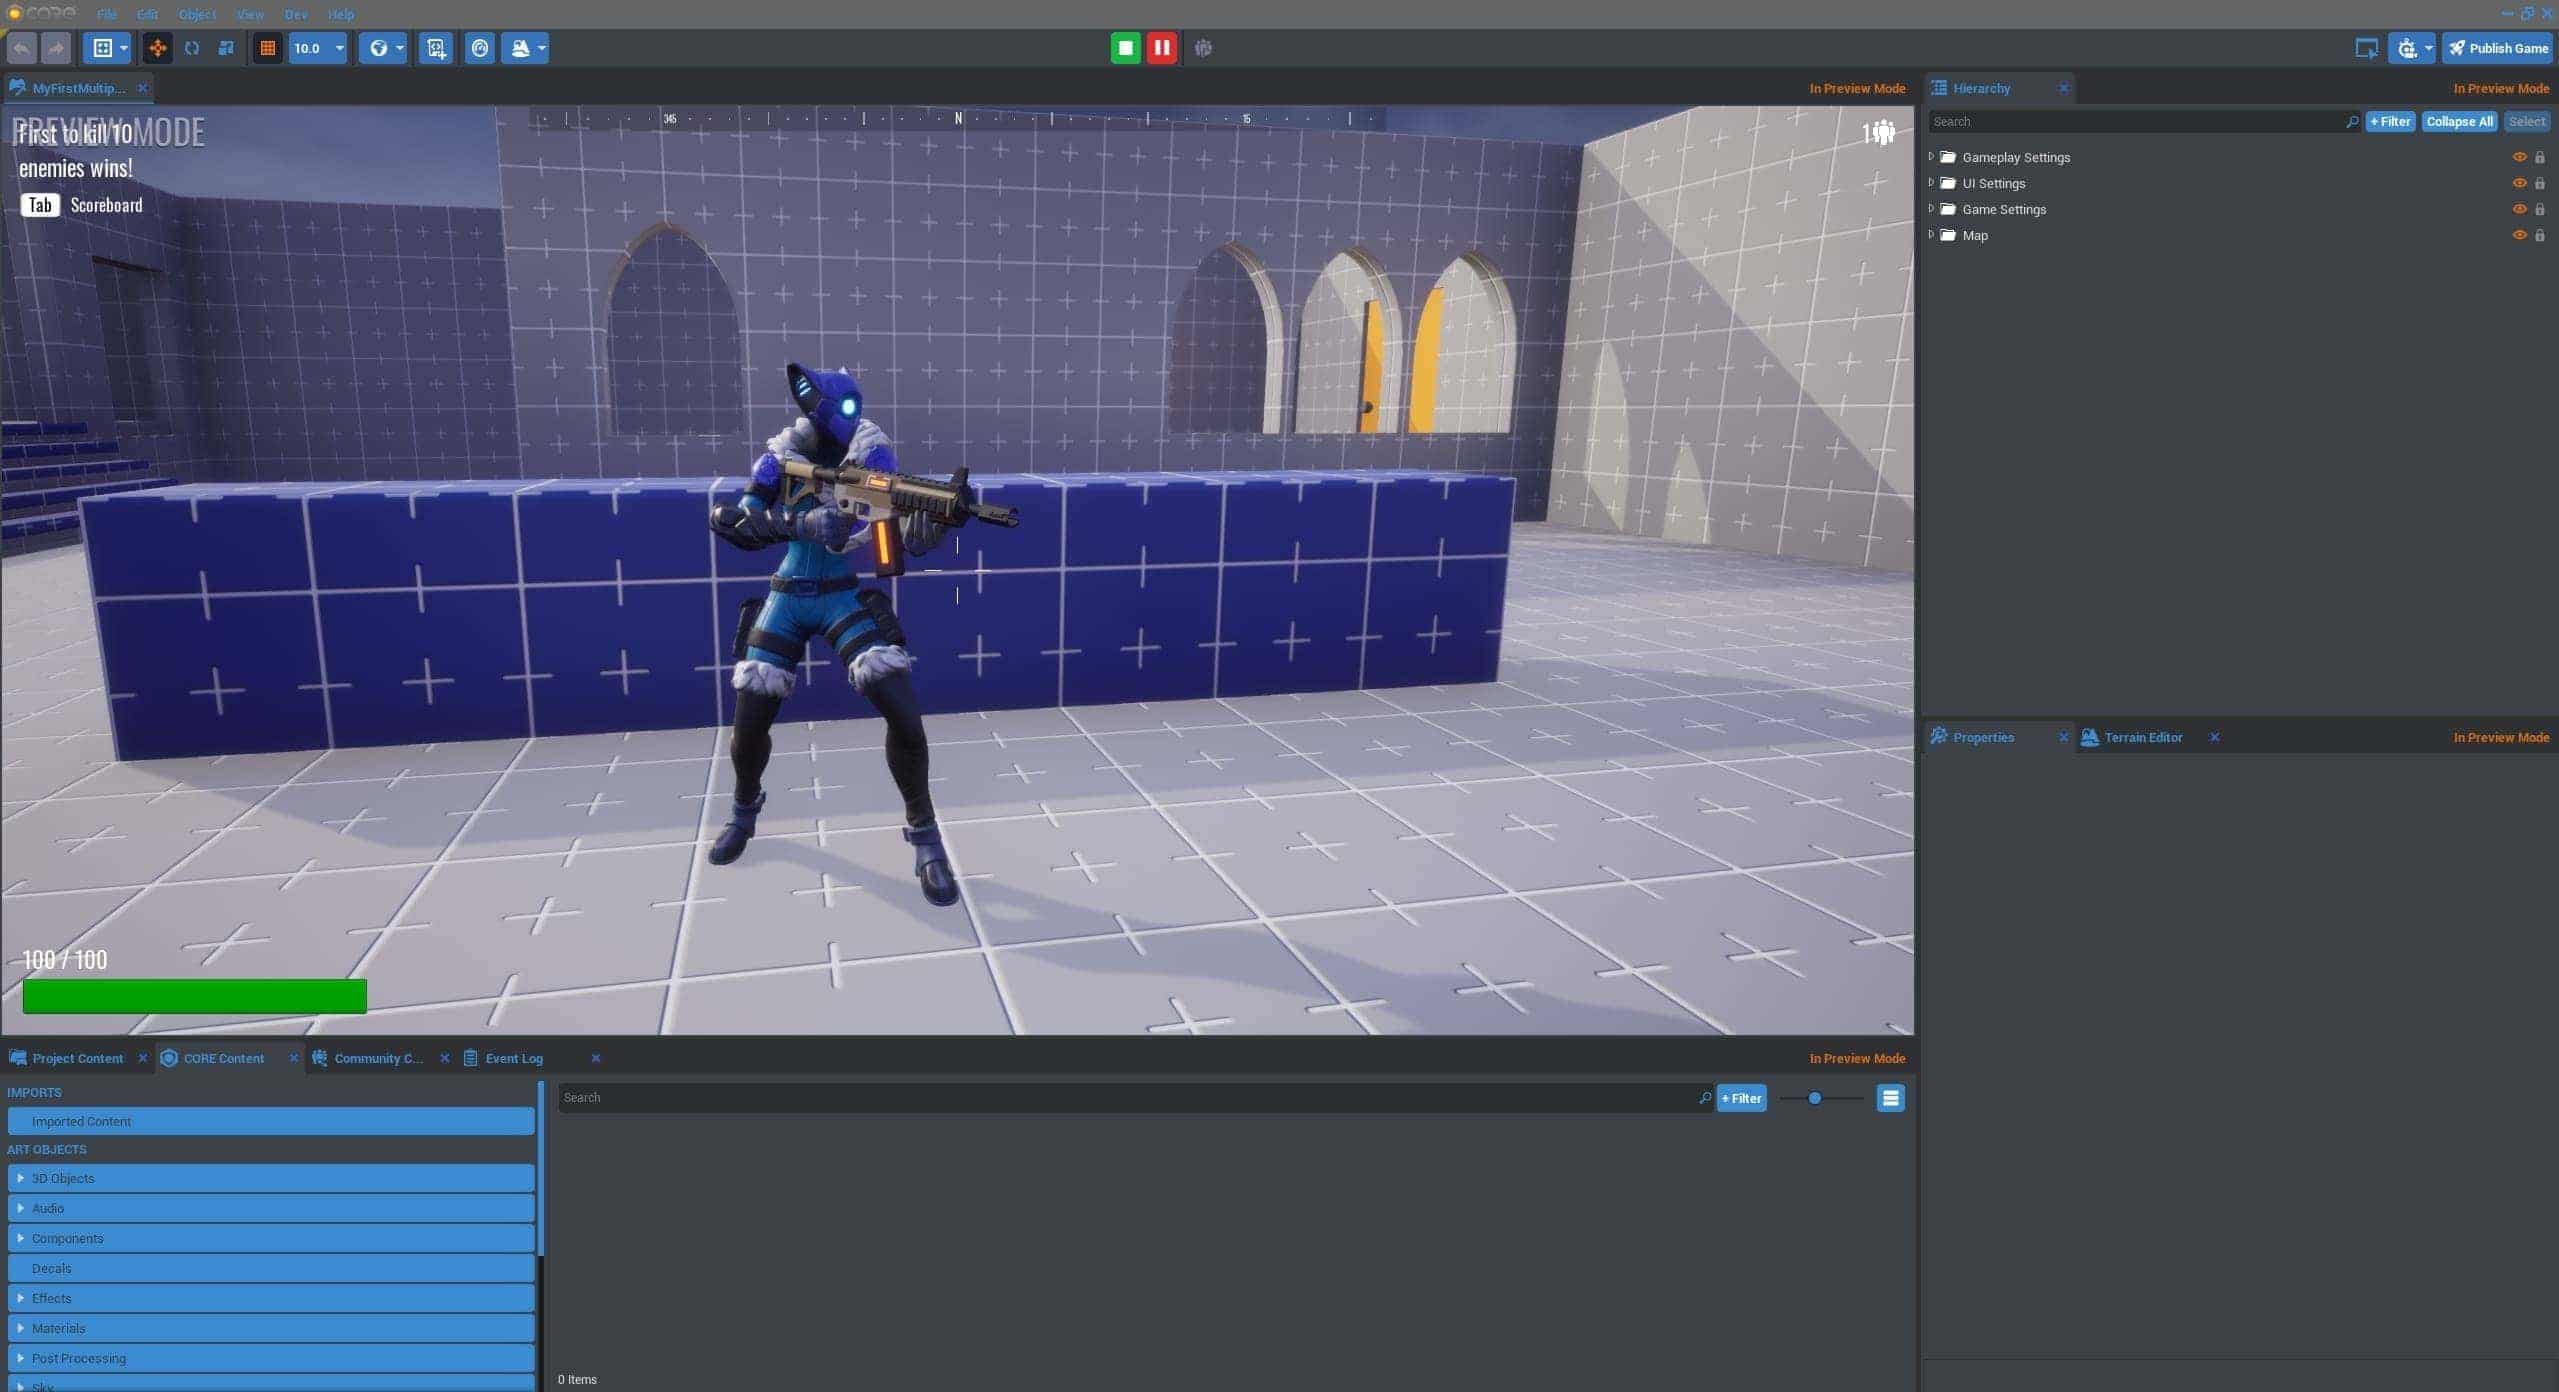
The Deathmatch framework gives you a complete game arena and shooter functionality out of the box.
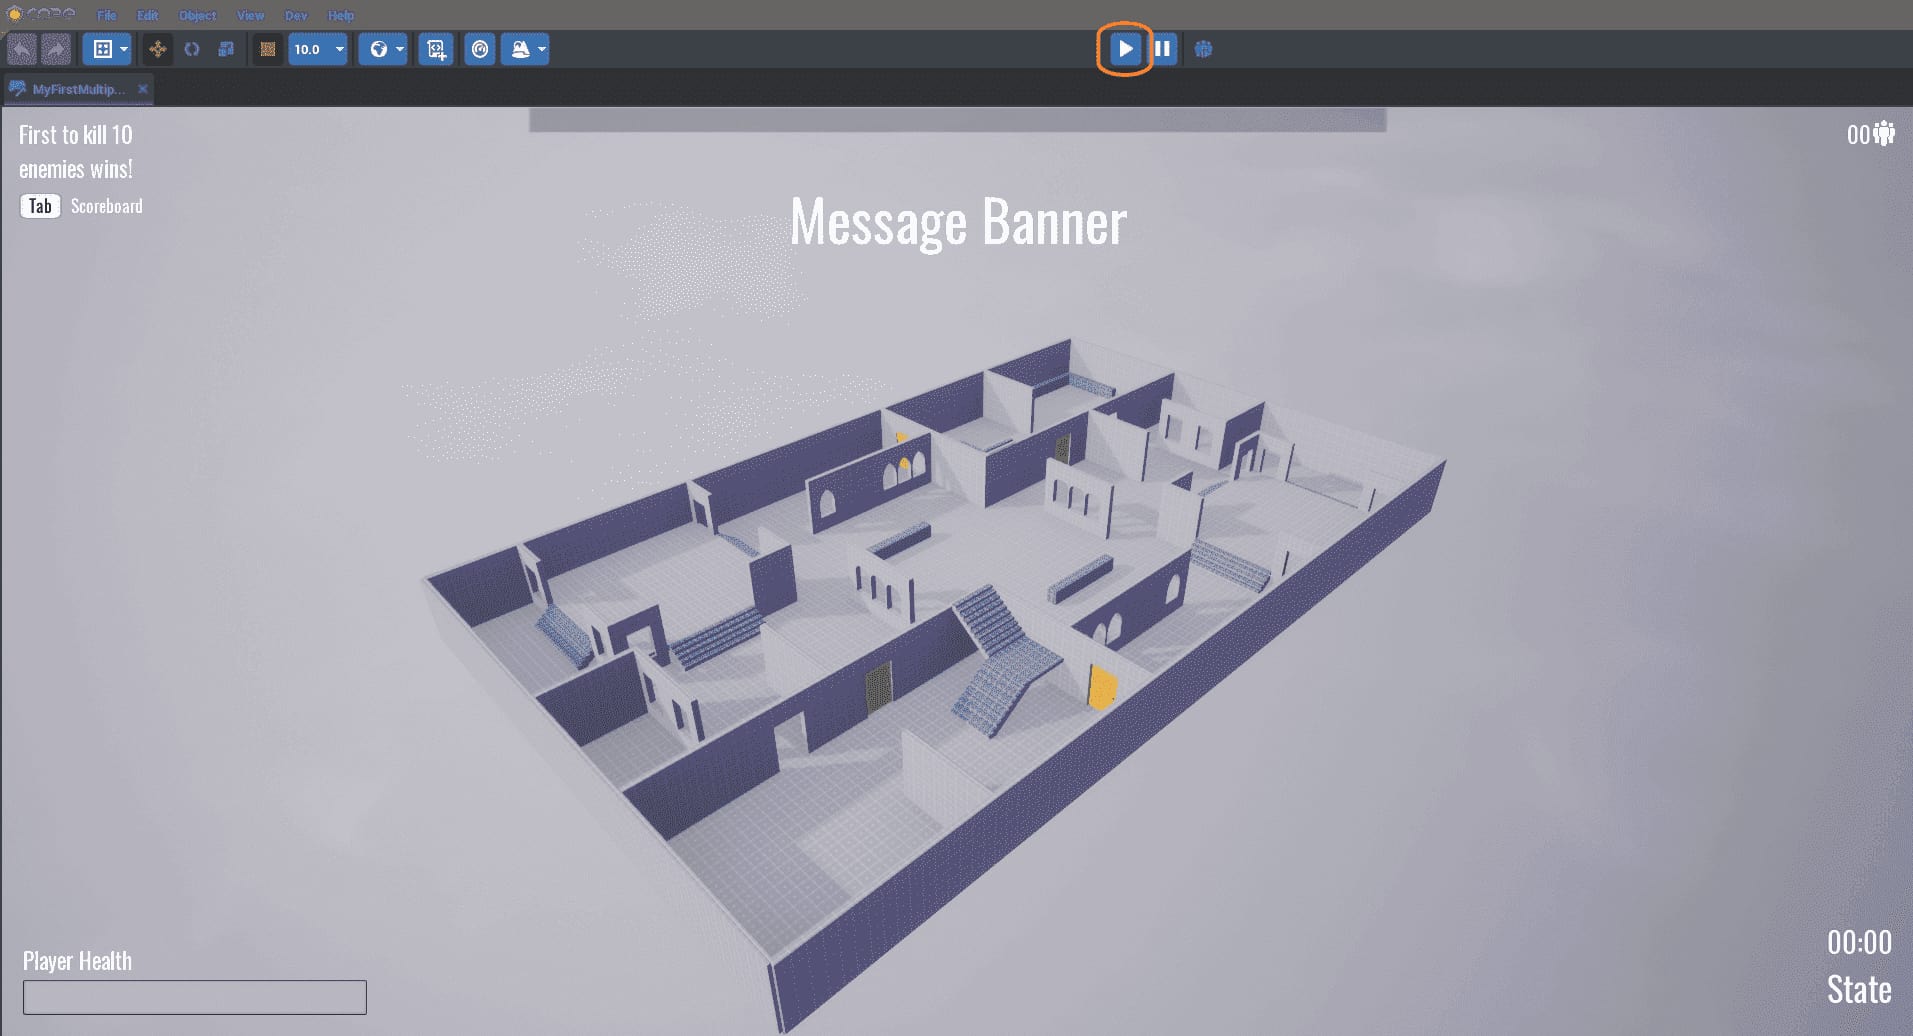
Test Player Movement
- Press
 or = to preview your project as a player.
 - Press Tab to pause the preview.
- Press
 or = to stop the preview.
As in any Core game project, you already have a working character controller.
- Move the character with the W, A, S, and D keys.
- Jump with Space.
- Crouch with C.
- Ride a mount with G.
Test Shooter Mechanics
Besides player movement, Deathmatch also gives each player a gun to shoot, and the ability to open and close doors.
- Shoot the default gun with the left mouse button.
- Open and close a door with F.
Test Multiplayer Gameplay
Core projects also include multiplayer networking by default. Because this is a crucial component of this game, it is important to test using Multiplayer Preview Mode as much as possible. 
Tip
You can use Alt+Enter to toggle between fullscreen and windowed mode. You can also use ++Win+Arrow++ to dock the screens side by side.
Customize the Arena
Explore Core Content
Core gives you a massive library of 3D assets, materials, sounds, and components for making games, which can be found in the Core Content Window.
Note
You can reopen the Core Content window by going to Window > Core Content in the top menu bar.
- Click Core Content.
- Drop down the 3D Objects menu to see the props and objects that can be added to the scene.
- Click on the Nature subcategory.
- Choose a bush and some other props to drag into the scene.
Create Hiding Places
You can move, turn, and resize objects.
- Click on the bush and press G to move it.
- Use the arrows to move it into a good hiding place for a player.
- Press R to change the size of the bush.
- Click and drag the white box at the center of the bush to resize it proportionately.
- Move, rotate, and scale the rest of the objects to enhance the scene.
Turn Off Collision
By default, Core objects have collision, so players can't just walk into bushes yet.
- Test this by pressing
 to preview the game.
 - Look at your props from a player's perspective. You should be able to walk up to a bush but collide with it once you touch it.
- Click on the bush to select it, and open the Properties window.
- Find the Collision property and change it to Force Off.
You should now be able to walk into a bush. Test this in Multiplayer Preview Mode to see how well it works for concealment.
Note
You can reopen the Properties window by going to Window > Properties in the top menu bar.
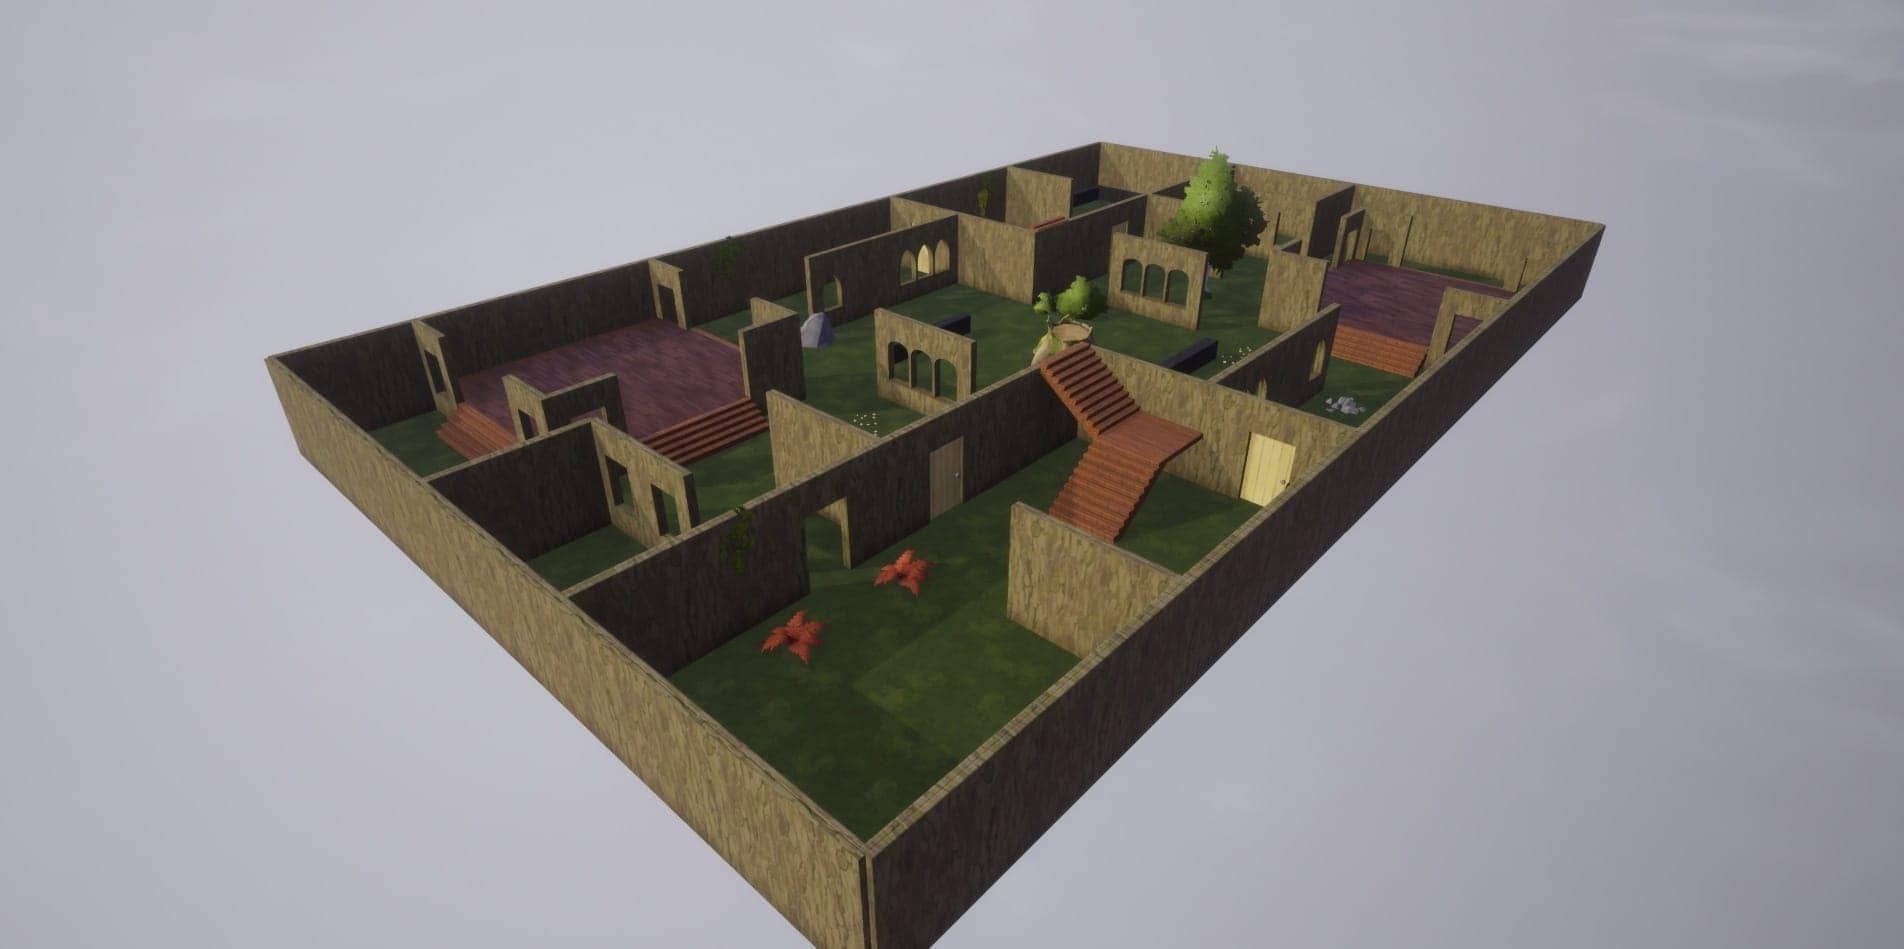
Finishing the Arena
Add a Material to an Object
Materials allow you to add colors and textures to the objects in the scene, by dragging and dropping them onto objects.
- In the Core Content window, drop down the Materials menu to see the options.
- Pick a material, and drag it onto one of the objects in the scene.
Cover the Walls
You can apply a material to multiple objects by selecting them.
- Use Shift+Left Button to select more objects.
- Left click and drag to select objects in an area.
- In the Hierarchy window, type "wall" into the search bar to show only the objects named Whiteboard Wall 01.
- Press Enter to select everything from the search.
- Choose a material, and drag it onto one of the walls.
Note
You can also select the entire list by clicking the first object in the list, then holding Shift and scrolling down to click the last.
Give Everything a Material
You can continue using these techniques to complete the appearance of your Deathmatch arena. Try searching for each of these labels to apply materials in groups:
stairswindow insertfloor
Info
You can customize materials and how they apply to objects. Learn more in the Custom Material Tutorial.
Customizing Gameplay
In this final section, you will find different ways to change the gameplay itself.
Add Double Jumping
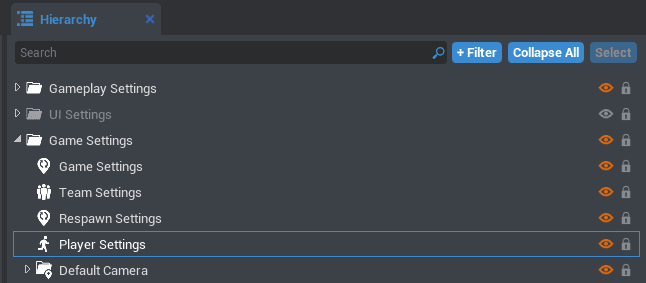
- Find Player Settings by searching for it in the Hierarchy.
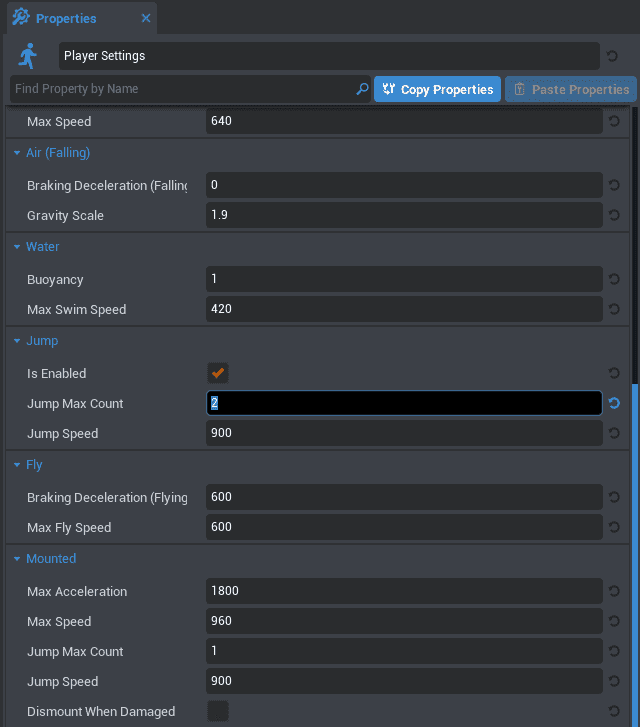
- Open the Properties window to see all the settings that can be changed for each player
- In the Jump section, change Jump Max Count to
2, - Press
 to test out double-jumping with Space.
Change The Round Kill Limit
In the top left corner of the screen in game, you can see that you win the Deathmatch by killing 10 opponents. This can be changed in Game Settings.
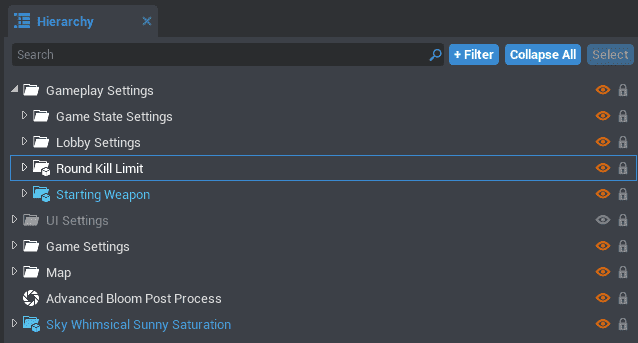
- Search for Round Kill Limit in the Hierarchy.
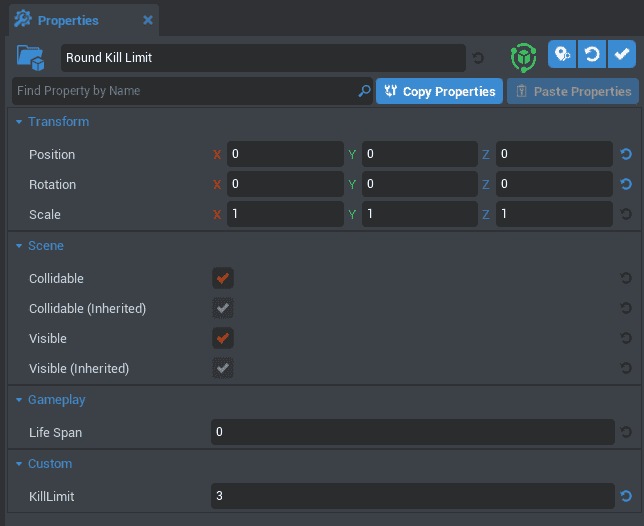
- Open the Properties window.
- Find the KillLimit property and change it to
2. - Start a Multiplayer Preview of your game, and see if you win by shooting an opponent twice.
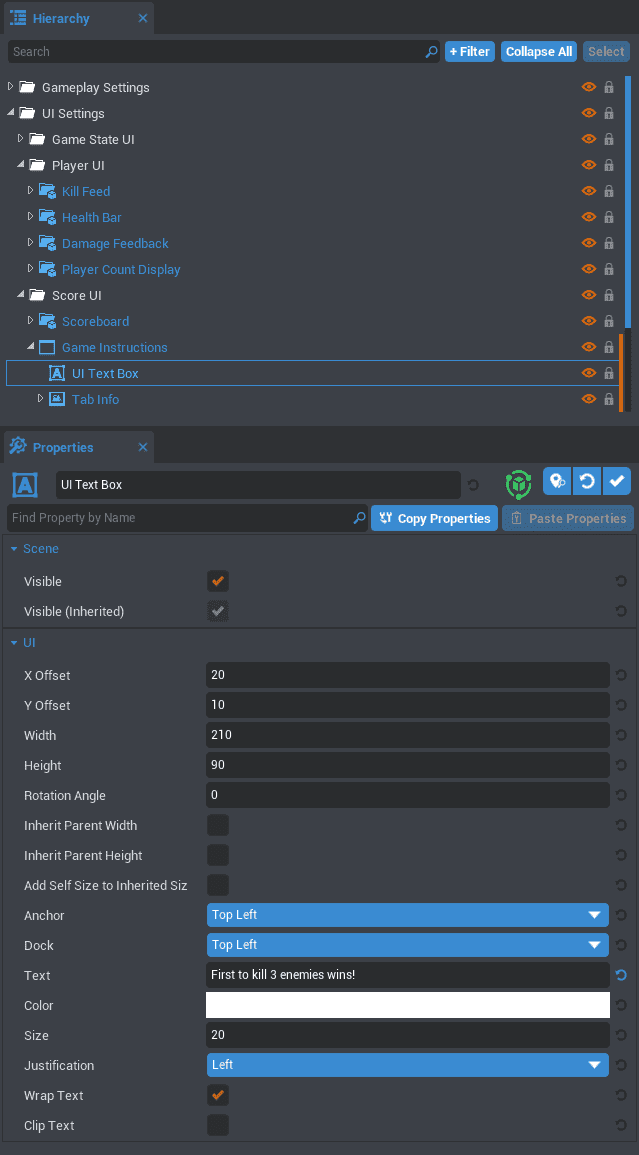
Change the UI Instructions
Although the game now ends after two kills, the instructions are shown on the screen still tell players to shoot for ten.
- Search for UI Text Box under Game Instructions in the Hierarchy.
- Open the Properties window.
- Change the Text property to match your game's win condition.
Move the Player Start
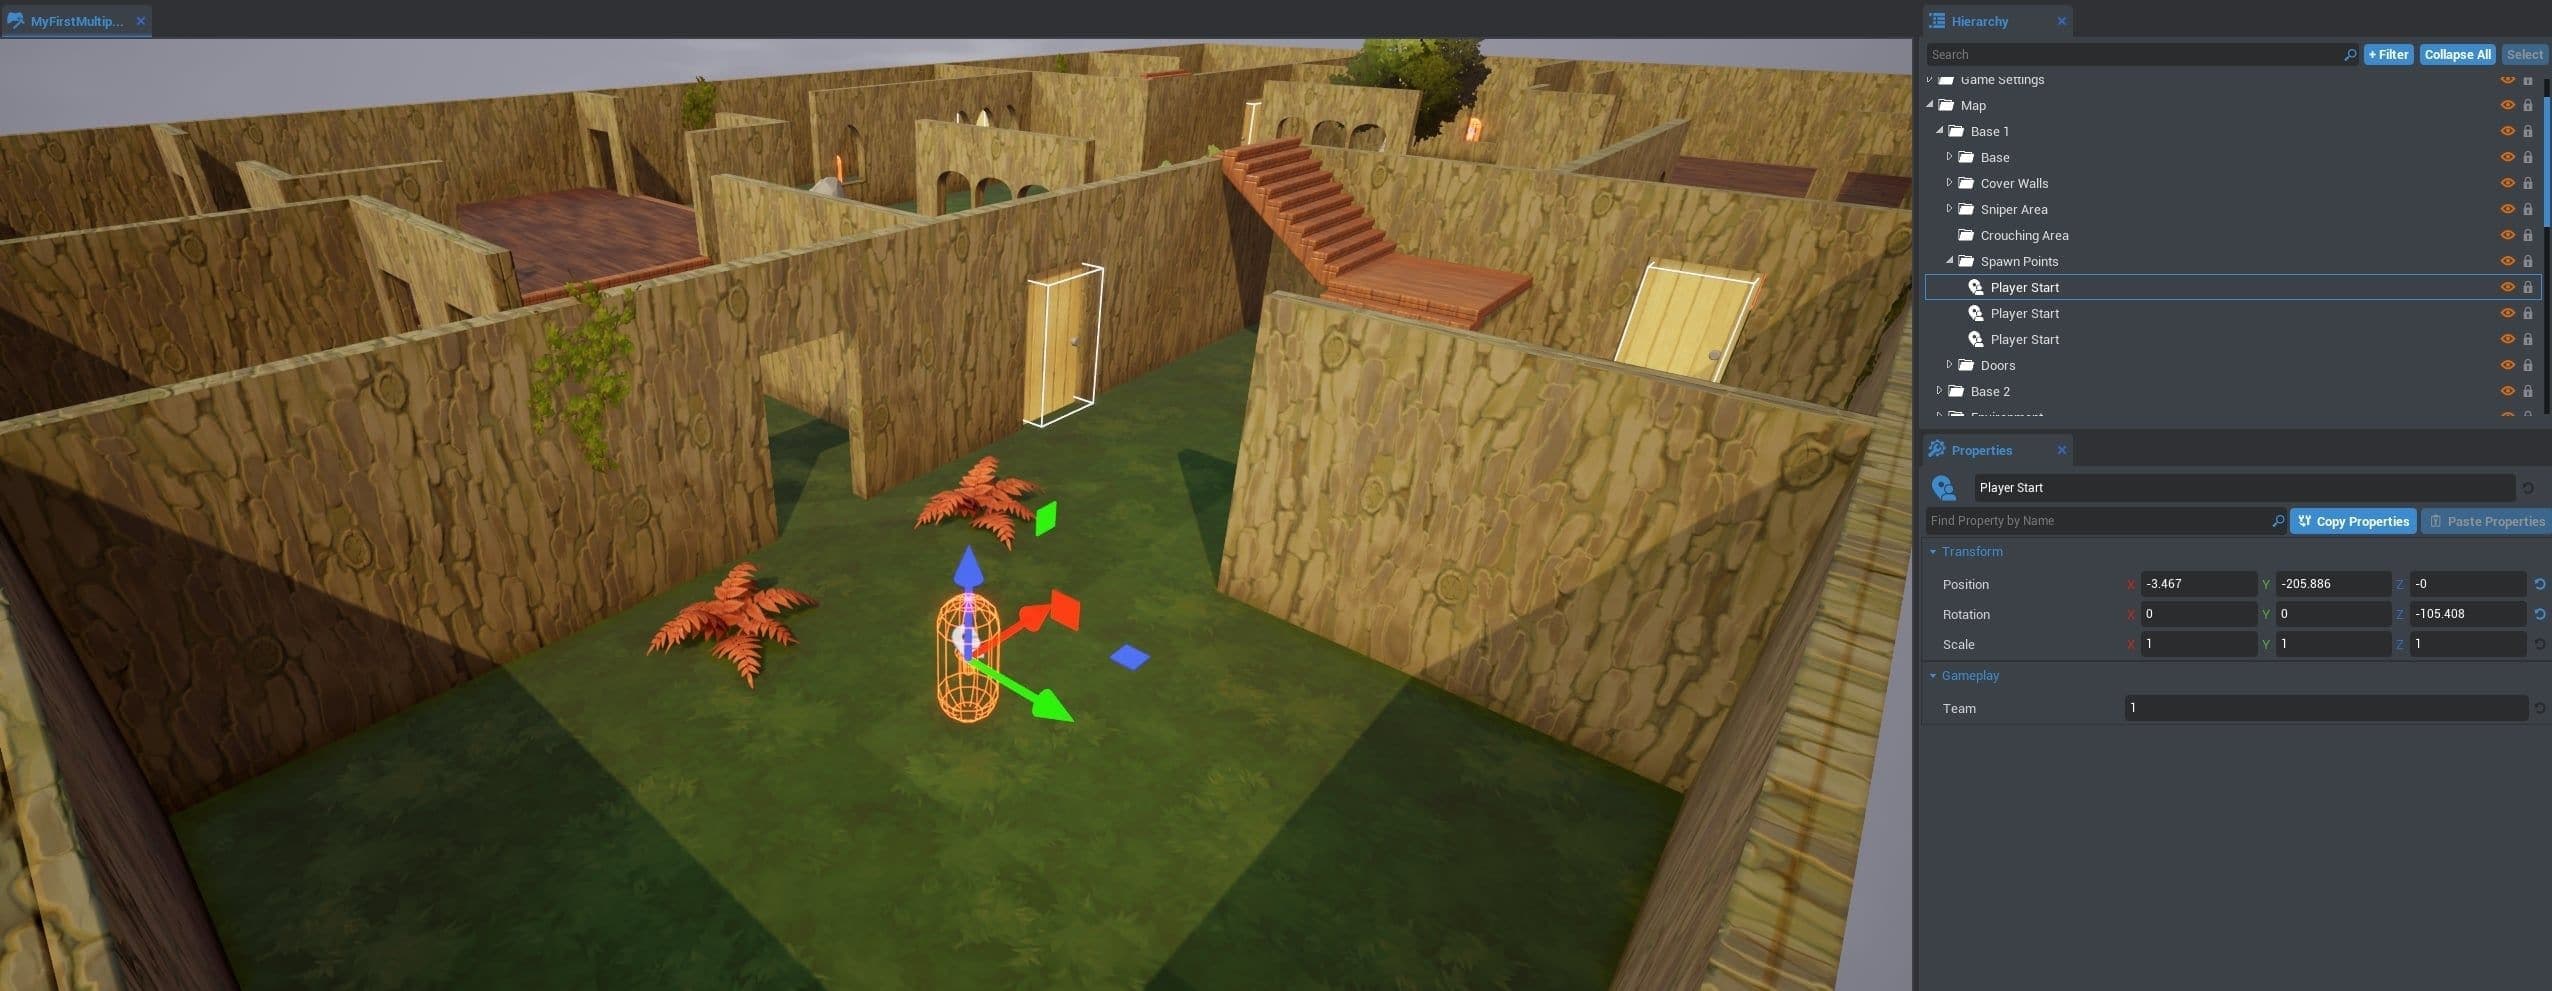
Let's move the "Player Start" where players spawn to be further apart. Press V to toggle gizmo visibility -- you can now see the camera, spawn points, and trigger boxes.
- Search for Spawn Point in the Hierarchy.
- Move the spawn points around the map the same way you would any object.
Tip
Press 0 to create a spawn point at your cursor's location. There are more Editor Shortcuts that can streamline your game creation flow.
Publishing a Game
You now have a complete and unique deathmatch-style game. If you are ready to test it with real human players, then publish your game.
Next Steps
Publish a Game | Terrain Tutorial | Basic Weapon Tutorial | Abilities Tutorial

